Floors in lighter shade of pale - whites and greys on the floors
Floors in Lighter Shade of Pale - Grey & White Washed Floors

Due to rising demand for light-shaded wooden floors over the past few years, several manufacturers have introduced new, easy-to-apply formulas for achieving white and grey finishes without the unpredictability that used to come with trying to lighten timber.
The renowned Danish company Junckers was one of the first to bring a white-tinted primer to market, producing a pale, almost bare-wood effect rather than a flat, opaque coat of paint. Woca followed shortly after with a similar product designed for use under its own range of lacquers. Both brands have since expanded into grey-toned primers too, following the same underlying approach, which means the same application logic below broadly applies whether you're after a bright white-wash or a more muted, driftwood-grey finish.
The white-washed look on wooden floors can read very differently depending on the timber and the plank finish it's paired with — clean and contemporary on smooth, tightly fitted boards, or more industrial and rustic when applied to textured, wire-brushed, or reclaimed planks where the grain and surface character are still clearly visible through the colour.
How the primers actually work
Both the Junckers PreLak White and Woca White primer systems work on the same basic principle: rather than sitting on top of the wood like paint, the primer is a pigmented, water-based product that soaks slightly into the open grain, producing that naturally transparent, milky, almost creamy white appearance rather than a flat, opaque coating. The wood's own grain, knots, and texture stay fully visible underneath the colour, which is exactly what separates a proper white-washed floor from one that's simply been painted white.
Both systems work well across a wide range of timbers — oak, ash, beech, and maple, as well as softer woods like pine — though it's worth knowing the result won't look identical on every species. Oak's open, pronounced grain tends to hold more pigment in the pores, giving a slightly more textured, characterful white-wash, while a tighter-grained wood like maple or beech takes the primer more evenly and reads as a flatter, more uniform white. Neither is better — it's really a question of which look suits the room.
Application-wise, both products are genuinely straightforward. They're low-odour compared with older oil-based bleaching or liming products, which is a real practical advantage if the room needs to go back into use quickly, and both contain a UV filter, so the white or grey tone stays stable rather than gradually yellowing under sunlight the way an oil-based finish would over a year or two.
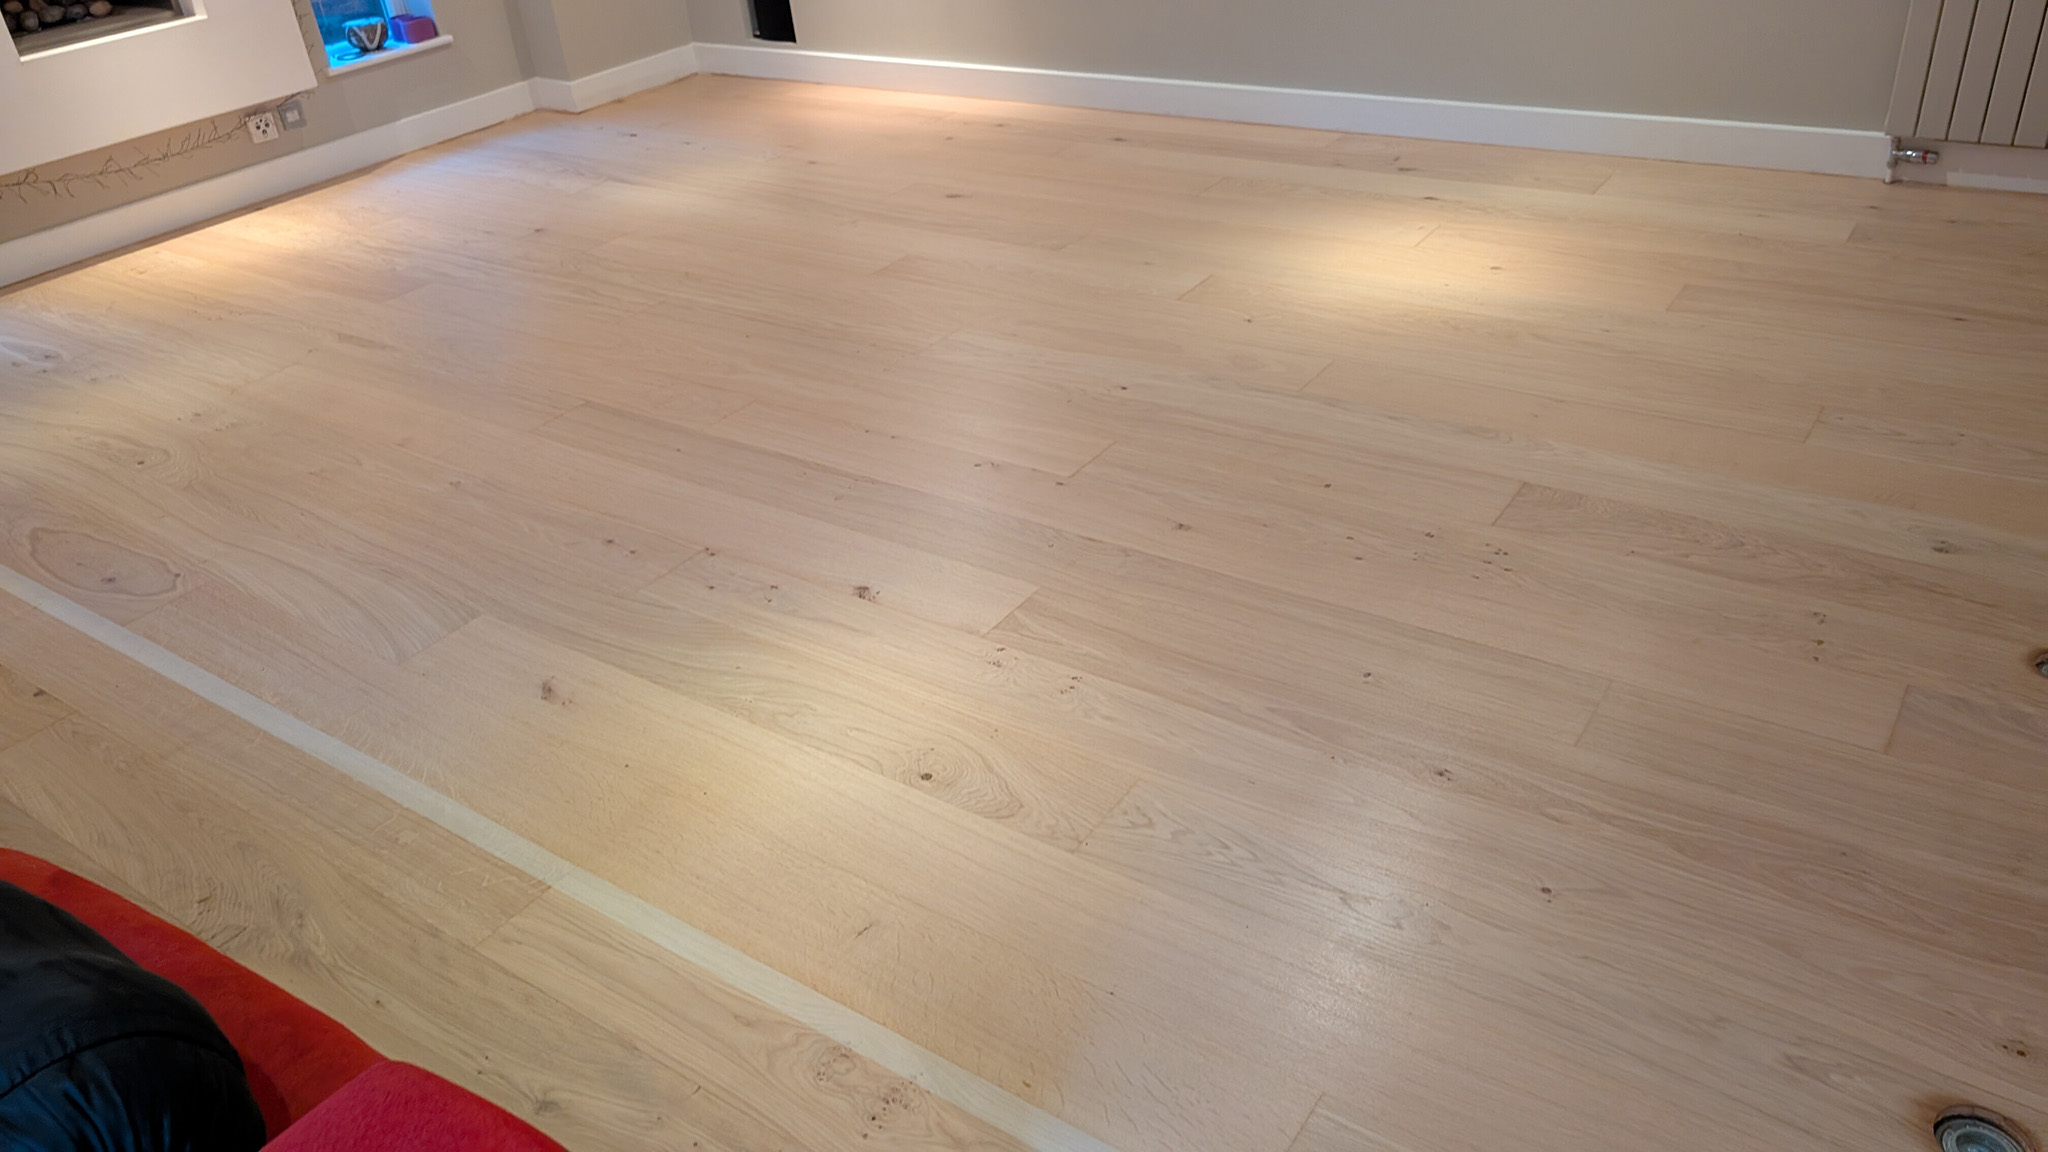
Building up the colour
One, two, or three coats of primer can be applied depending on how strong and opaque you want the final colour to be. A single coat gives the lightest, most translucent effect, letting more of the timber's natural tone show through underneath the white or grey. Two coats is the most common choice for a balanced, confidently white-washed look without losing the grain entirely, and three coats gives close to full, solid coverage for anyone after a more uniform, near-opaque finish. A light key-sand with a fine abrasive (around 150–180 grit) between coats helps knock back any raised grain and keeps the build-up even, and each coat needs to be fully dry — typically a few hours under normal room conditions — before the next goes on or before the final lacquer stage.
Once the desired depth of colour is built up, the whole floor is over-coated with a water-based lacquer to seal and protect the finish. This top coat is what actually takes the daily wear from foot traffic, furniture movement, and cleaning — the primer itself isn't designed to be a wear layer on its own, so skipping the lacquer stage or under-coating it will leave the white-wash vulnerable to scuffing and premature wear in high-traffic areas.
A few practical notes before starting
The floor needs to be properly sanded back to bare, clean timber before any primer goes down — any trace of old finish, oil, or wax left in the grain will block the pigment from soaking in evenly and can leave patchy, blotchy results that are difficult to correct afterwards. It's also worth doing a small test patch in an inconspicuous spot, such as inside a cupboard or under where a rug will sit, since the same product can look noticeably different depending on the specific batch of timber, its age, and its natural undertone — a pale European oak and a slightly pinker American red oak, for instance, won't necessarily white-wash to quite the same shade even using the identical product and coat count.
Maintenance afterwards is much the same as any lacquered floor — regular sweeping or vacuuming and occasional damp mopping with a wood-floor-safe cleaner — though very light-coloured finishes do tend to show scuffs, dark furniture marks, and everyday dirt a little more readily than a mid-tone or darker floor simply because there's less colour to camouflage them in. A light recoat of lacquer every few years, once foot traffic starts dulling the sheen in high-use areas, keeps the white or grey tone looking fresh without needing to repeat the full primer process from scratch.
Couldn't be simpler.


