Staining and painting wooden floors is not the same thing
Floor painting and staining might sound familiar but actually there is a huge difference. Find out what's the effect of each one of them.
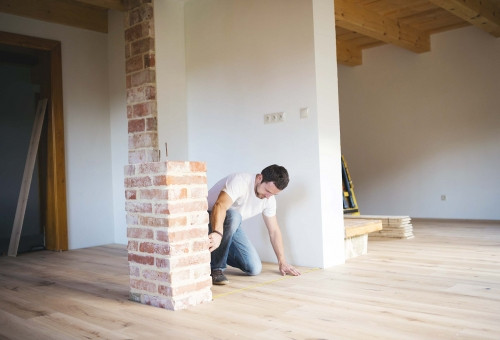
If there is one place in the world where we are free to do whatever we want it is our homes. We can change, transform and improve it any way we like, floors included. It is not so rare these days to become the owner of a fine new home and find the interior not to our taste. At this point, we may want to change the appearance of our floor by either staining or painting it. Which is better and why?

The difference between staining and painting
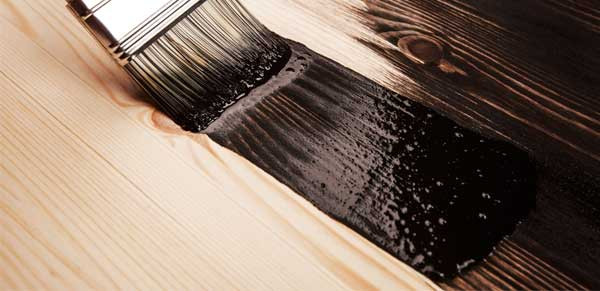
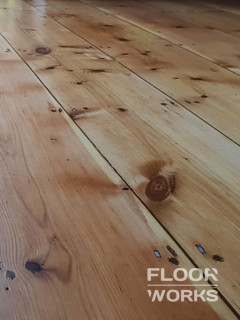
The big differences between staining and painting are rooted in the strength of the overall impression. Staining will change the wood’s colour but you will have no trouble understanding which material is below. You can see the grain, the knots, and the textures despite the change. While the effect isn’t as strong as painting, a stained floor will preserve its colour much better, be more resistant to damage and will last longer. Many people seem to think so because it is it the most popular choice.
The painting, on the other hand, will completely cover the existing finish and then you cannot see the wood itself. Painting provides a more complete and thorough change. It is also easier to remove if you are unhappy with the result. One of its biggest problems is its durability. Chips and cracks appear fairly often. Any damage suffered by a painted floor will also be much more noticeable. In general, painted floors are considered the less attractive option because of how fragile they are.

Floor painting explained
While painting is considered easy, it doesn’t mean the job should to be sloppy. Yes, in theory, you can just clean it a bit, put on a primer, paint and let it dry. In practice, you would need even and finely buffed surface on which to apply the paint so it can stay in good condition for longer. A proper painting procedure should look like this:
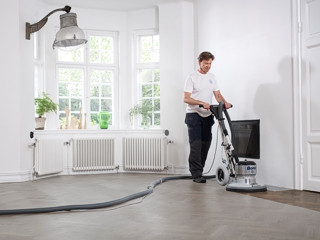
Sanding. Start by buffing with a fine, high grit sandpaper to make sure you have a perfectly smooth surface.
Cleaning. Vacuum and wipe with a small amount of water and wood floor cleaner. The moisture must be kept to a minimum and the floor should be given at the very least two days to dry up completely. If no sufficient drying time is allowed, the moisture will likely ruin the painting.
Priming. Cleaning is important because even small amounts of dust have abrasive properties. If you have any gaps in your floor you can use the dust collected to fill those before applying the primer. If you are wondering what kind of product would be best suited for the task, an oil-based, penetrating primer is arguably the best choice here.
Re-sanding. It is possible for the wood’s fibres to swell up after the primer is applied. If you attempt to paint on top of such surface, you may find the results far from perfect. Of course, after each sanding run, everything has to be cleaned and left to dry again.
Paint application. The paint can be distributed with a bristle brush or a microfiber roller. Just make sure to keep the paint coating very thin. The brush will be slower and require more work but it will ensure there are no bubbles left after the procedure is finished.

Drying. The most important part here is to make sure there are no bubbles. Clean and smooth surface means no bubbles. You must wait at least 24 hours before applying the second coat of paint.
Final paint coats. In the end, you should have no less than three paint coatings with a drying time of 24 hours between applications. Each coating has to be very thin so it can cure better.
Finishing. The very last thing is applying a finish and leaving it sufficient time to dry. Water based polyurethane lacquer is usually the finish of choice because of the great protection it offers. Don’t forget it needs some time to dry as well!
What does floor staining involve?
To properly stain a hardwood you need a real expert. Skilled floor men are sometimes hired specifically for this part of the floor restoration process. It is almost an art by itself because getting the right colour is not an easy task to accomplish. What makes it so hard? Well, usually people aren’t after just some colour. They want something specific. Something that is popular right now or will fit the interior in a certain way.
Many factors can affect how the floor will look after the stain is applied. For example, the type of wood is a factor. Some species like birch and maple are close-pored and do not absorb the stain well. It can become quite a mess if an unskilled person attempts to work with them. Another factor is the finish. Oils and oil based finishes turn yellow as the time passes. If you have a grey floor, this type of finish will slowly change its colour as it ages which is obviously unacceptable. Professionals use water based lacquers which are more transparent and won’t affect the stain.
The quality of the sanding and buffing will also have an impact. Stained floors tend to highlight any imperfections in the grain, especially when exposed to sunlight. If the sanding is not at a professional level you may want to avoid staining completely or any flaws will be exposed for everyone to see.
At the moment, the trend is to go for brown, ebony, grey or white washed floors. It isn’t that hard to stain a floor dark. However, grey and white washed floors are a completely different matter. Being lighter, they are also much more affected by the original wood’s colour.
The important thing to remember is that you can never stain a floor without removing the already existing finish. After the sanding is completed the surface has to be cleaned and the floor conditioned with a wet mop to raise the grain. This will allow the stain to better soak into the wood.
You only need a bucket to mix the stain, as well as a paint brush, decorator rag or paint roller to spread it. The stain can dry incredibly fast so after five to ten minutes any excess product has to be removed to avoid uneven spreading. The amount of time you allow the stain to set on the floor will determine just how dark the floor is going to be. It is also a good idea to buff the floor after the stain has fully dried up before applying the finish. Again, we have to warn you, mechanically, staining is not a hard process, yet getting it right can be quite difficult. It never hurts to ask for professional help.